VLANS and VLAN Groups
Each VLAN may be assigned to a site, tenant, and/or VLAN group.
Each VLAN must be assigned a status. The following statuses are available by default:
- Active
- Reserved
- Deprecated
In general, VLANs can have overlapping names and IDs. The exception to this is VLANs within a VLAN Group: each VLAN within a group must have a unique ID and name.
A VLAN Group may be assigned to a specific site, but a Group cannot belong to multiple sites. VLANs may be assigned to a specific site as well.
The Nautobot documentation has more info about VLANs and VLAN Groups.
VLAN Example
The following example will show:
- Creating a
vlan 200without a site assignment (global scope) - Creating two VLANs, each with overlapping Names and IDs: ID =
100and Name =vlan 100- Neither of the
vlan 100instances will be assigned to a group, but each of the VLANs will be assigned to a different site (site-specific scope)
- Neither of the
- How the site-specific and global scopes affect which VLANs can be assigned on which Devices
Note
This example will require a Site (Ottawa 1) within a Region (Ottawa) in the North America Region in addition to the Vancouver 1 Site and Vancouver Region created prior.
Refer back to the Creating a Site and Creating a Region sections to do so.
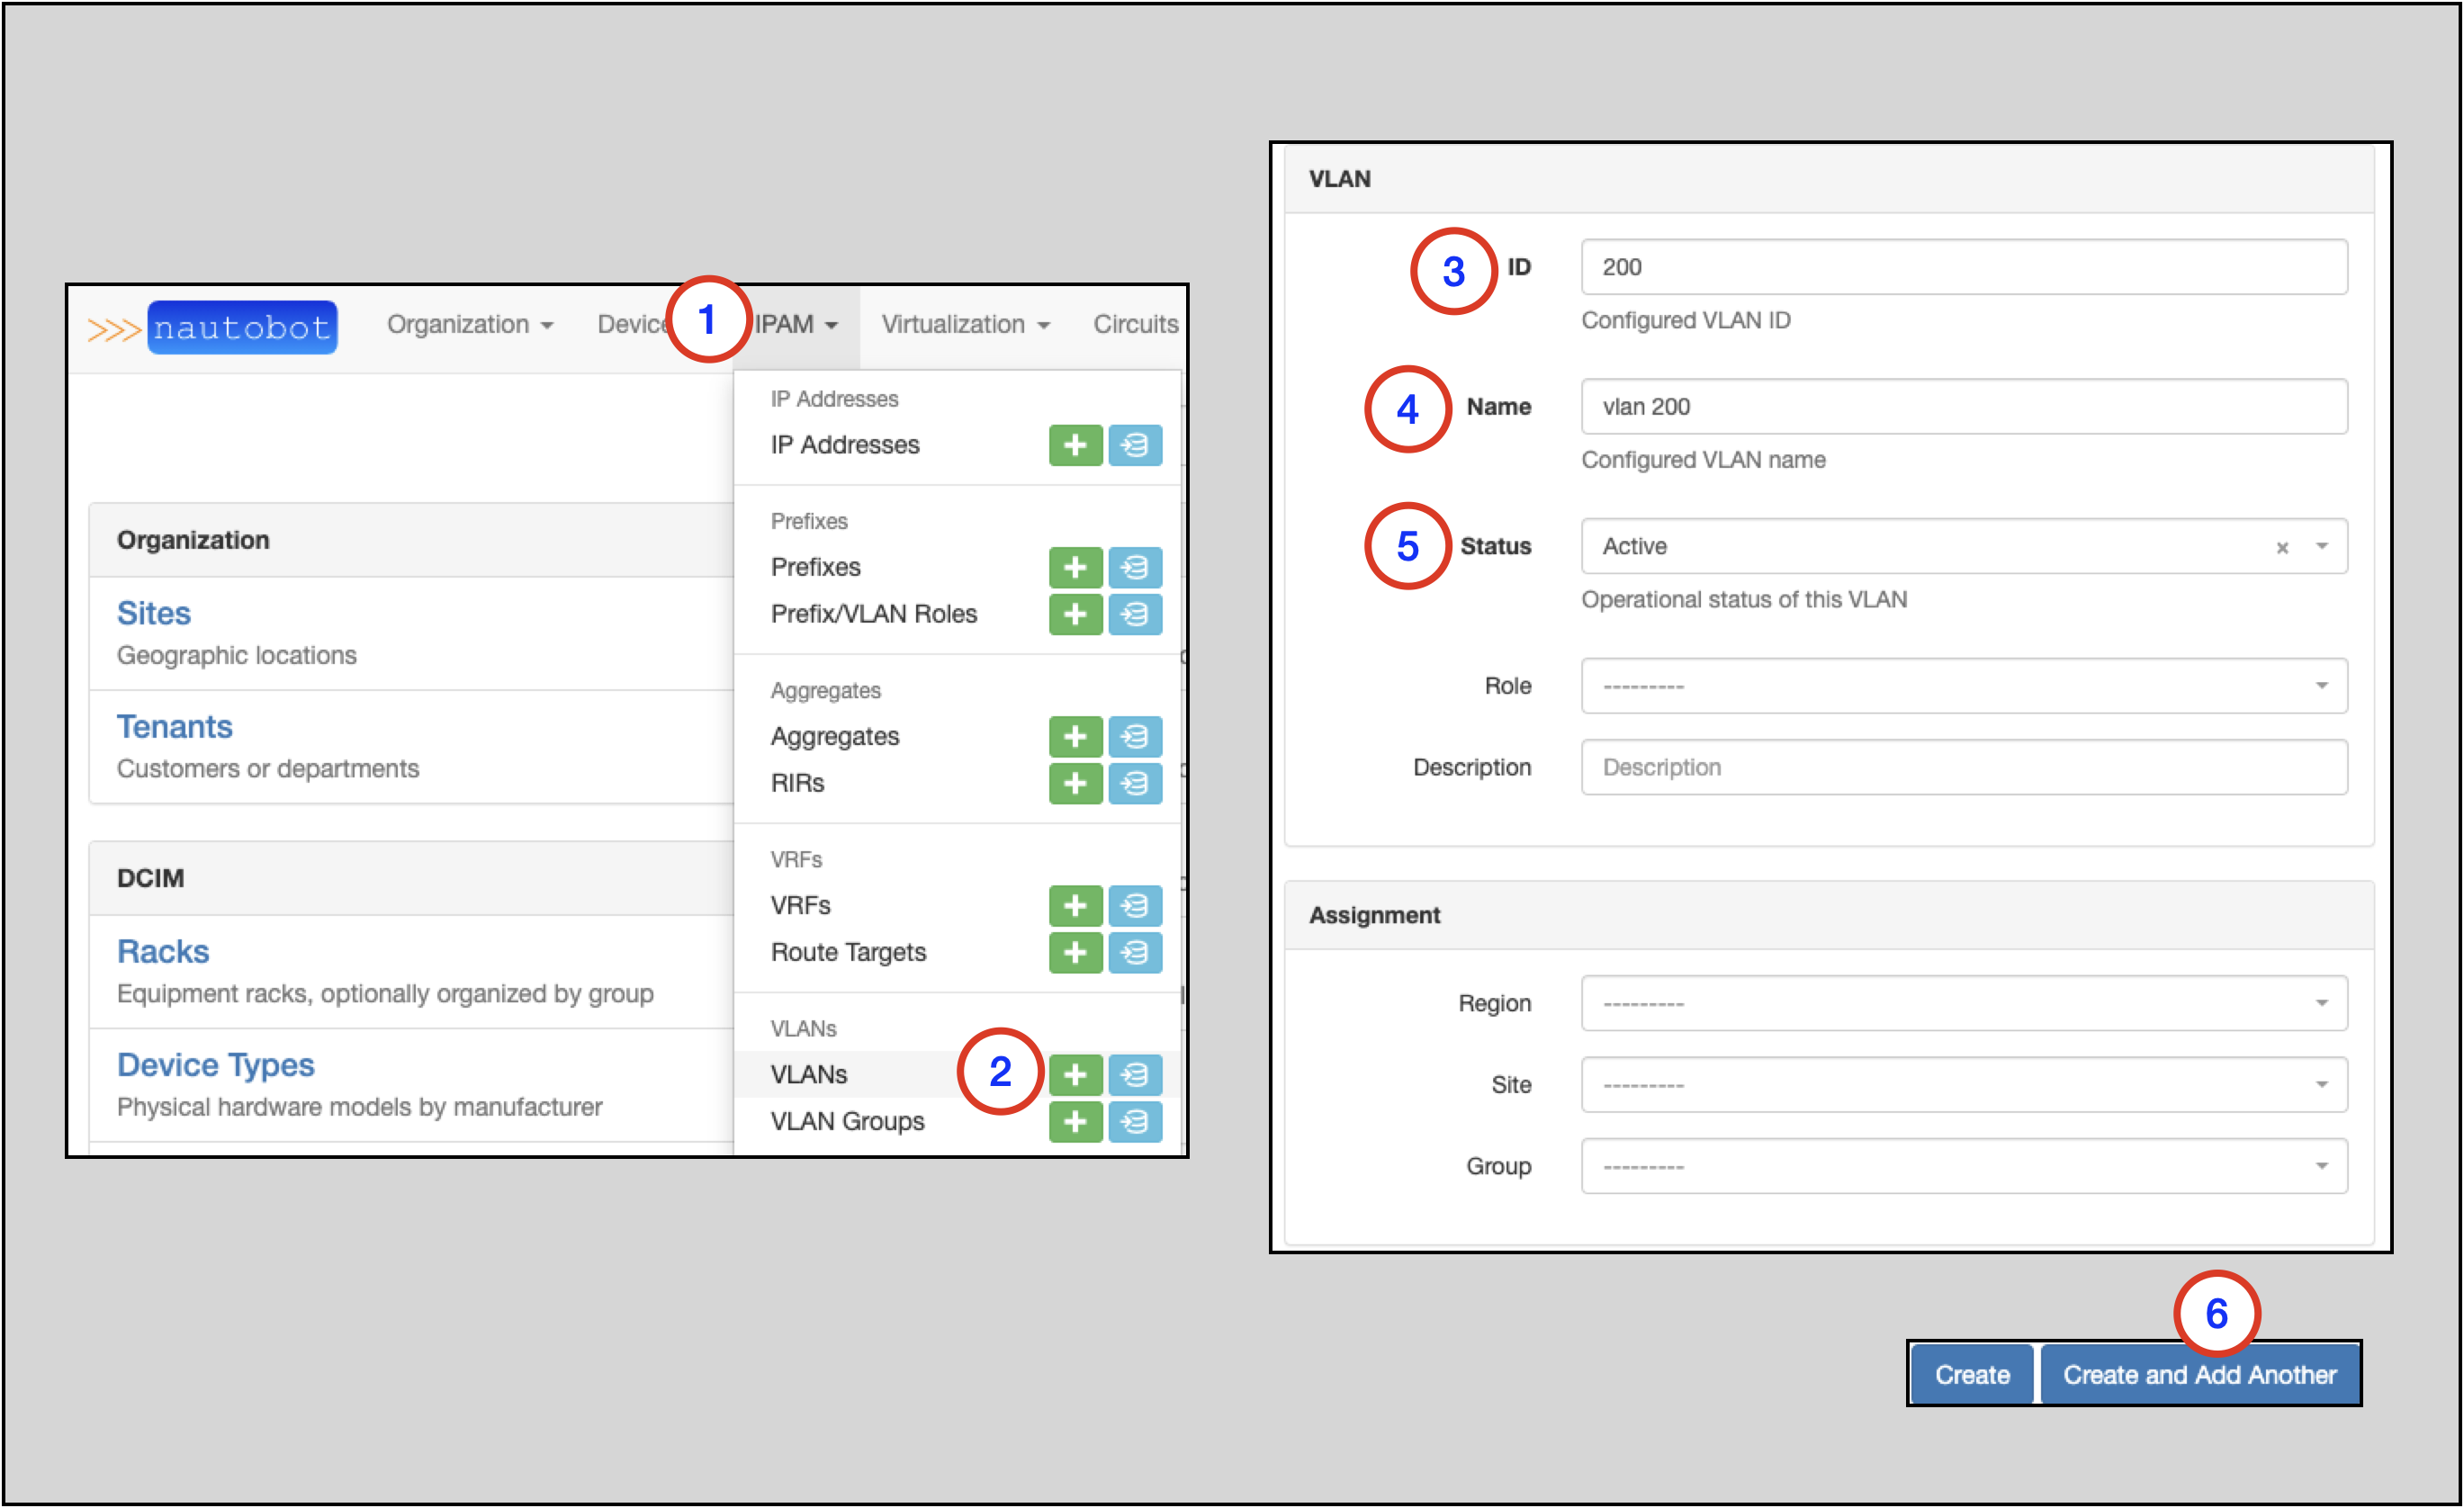
Creating the VLANs
- Click on IPAM in the top navigation menu
- Look for the VLANS option and click on the + to go to the
Add a new VLANform - Populate
IDwith200 - Populate
Namewithvlan 200 - Select
StatusasActive - Click on
Create and Add Anotherto save; you will then be taken to theAdd a new VLANform
Note
The required parameters to create a new VLAN are bolded in the Add a new VLAN form: ID, Name, and Status
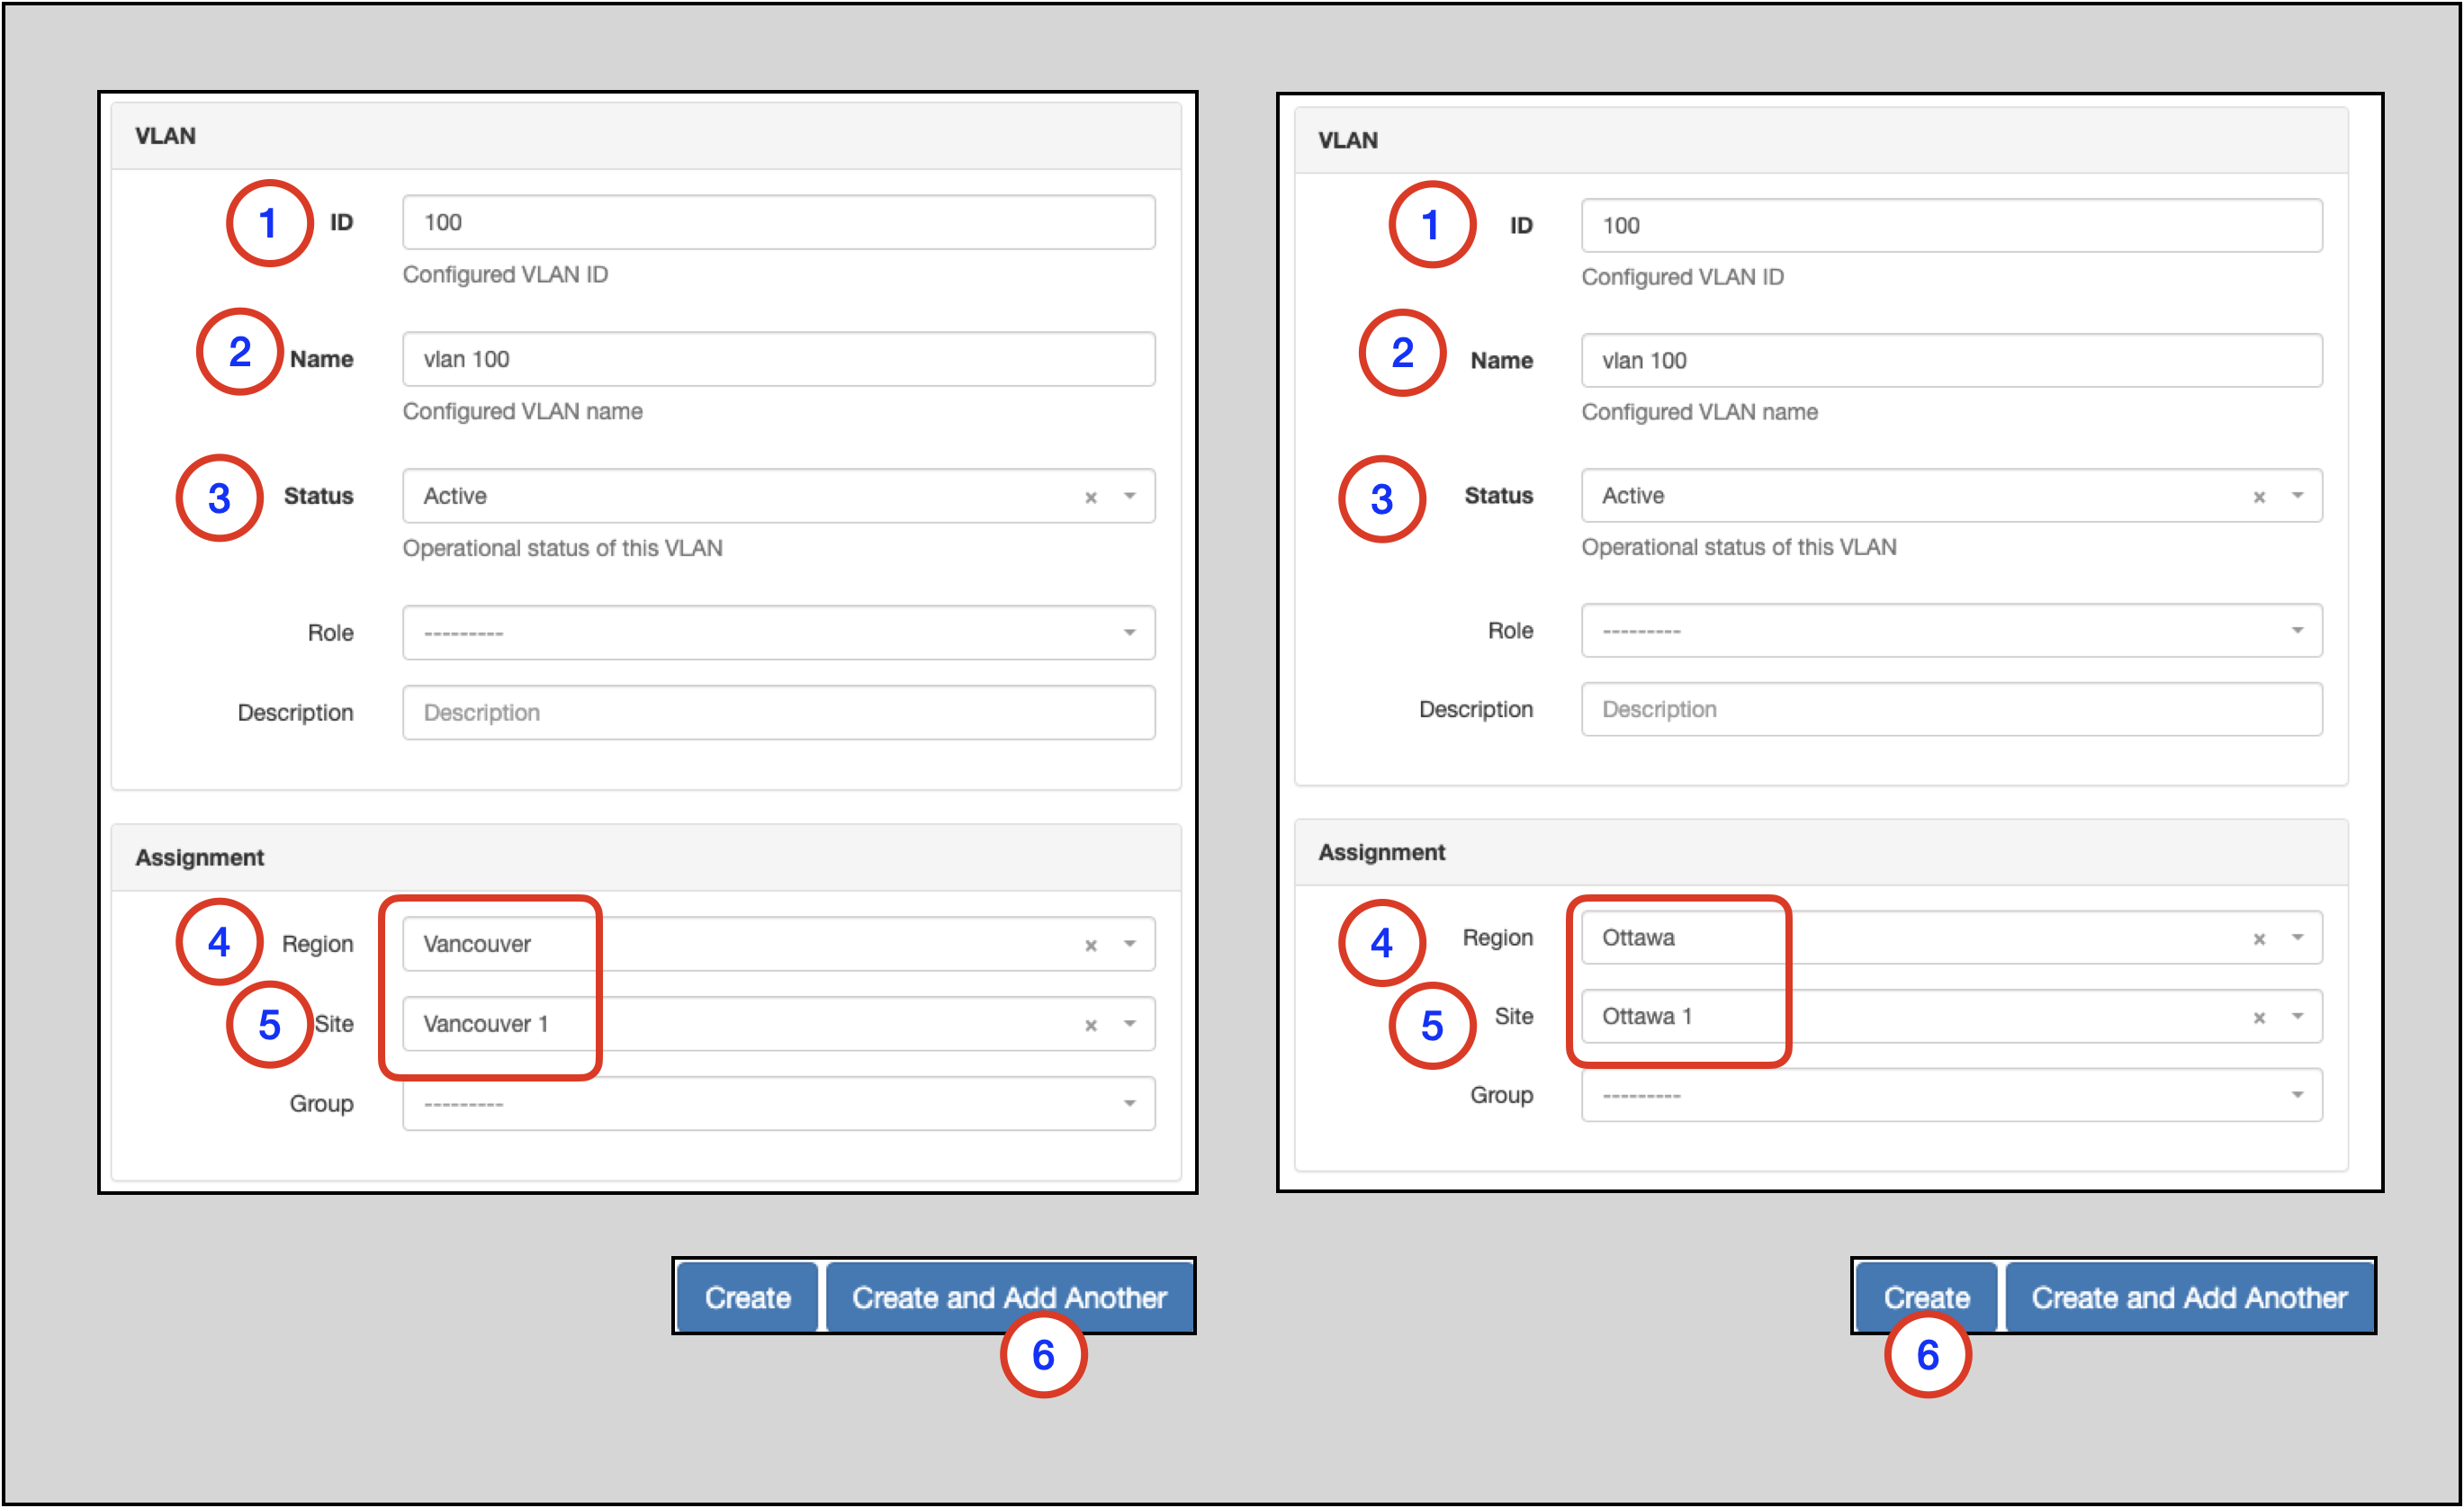
Now we'll create two instances of VLANs, each with ID = 100 and Name = vlan 100 and an Active Status.
The differentiator will be that one instance will be assigned to the Vancouver 1 Site and the other to the Ottawa 1 Site.
On the Add a new VLAN form:
- Populate
IDwith100 - Populate
Namewithvlan 100 - Select
StatusasActive - Select
Vancouverfrom theRegionselector drop-down - Select
Vancouver 1from theSiteselector drop-down - Click on the
Create and Add Anotherbutton
Note
The Region drop-down selection in step 4 is optional and only meant to narrow down the options presented in the Site drop-down selector in Step 5.
A VLAN cannot be assigned to a Region.
- Populate
IDwith100 - Populate
Namewithvlan 100 - Select
StatusasActive - Select
Ottawafrom theRegionselector drop-down - Select
Ottawa 1from theSiteselector drop-down - Click on the
Createbutton when complete with the second instance
Once you've created the three VLANs and then hit the Create button, you will be taken to the VLANs main page. On that page,
you'll see the three VLANs and the Site assignment for each one. Each vlan 100 instance will have a Site assignment, while
vlan 200 will not:

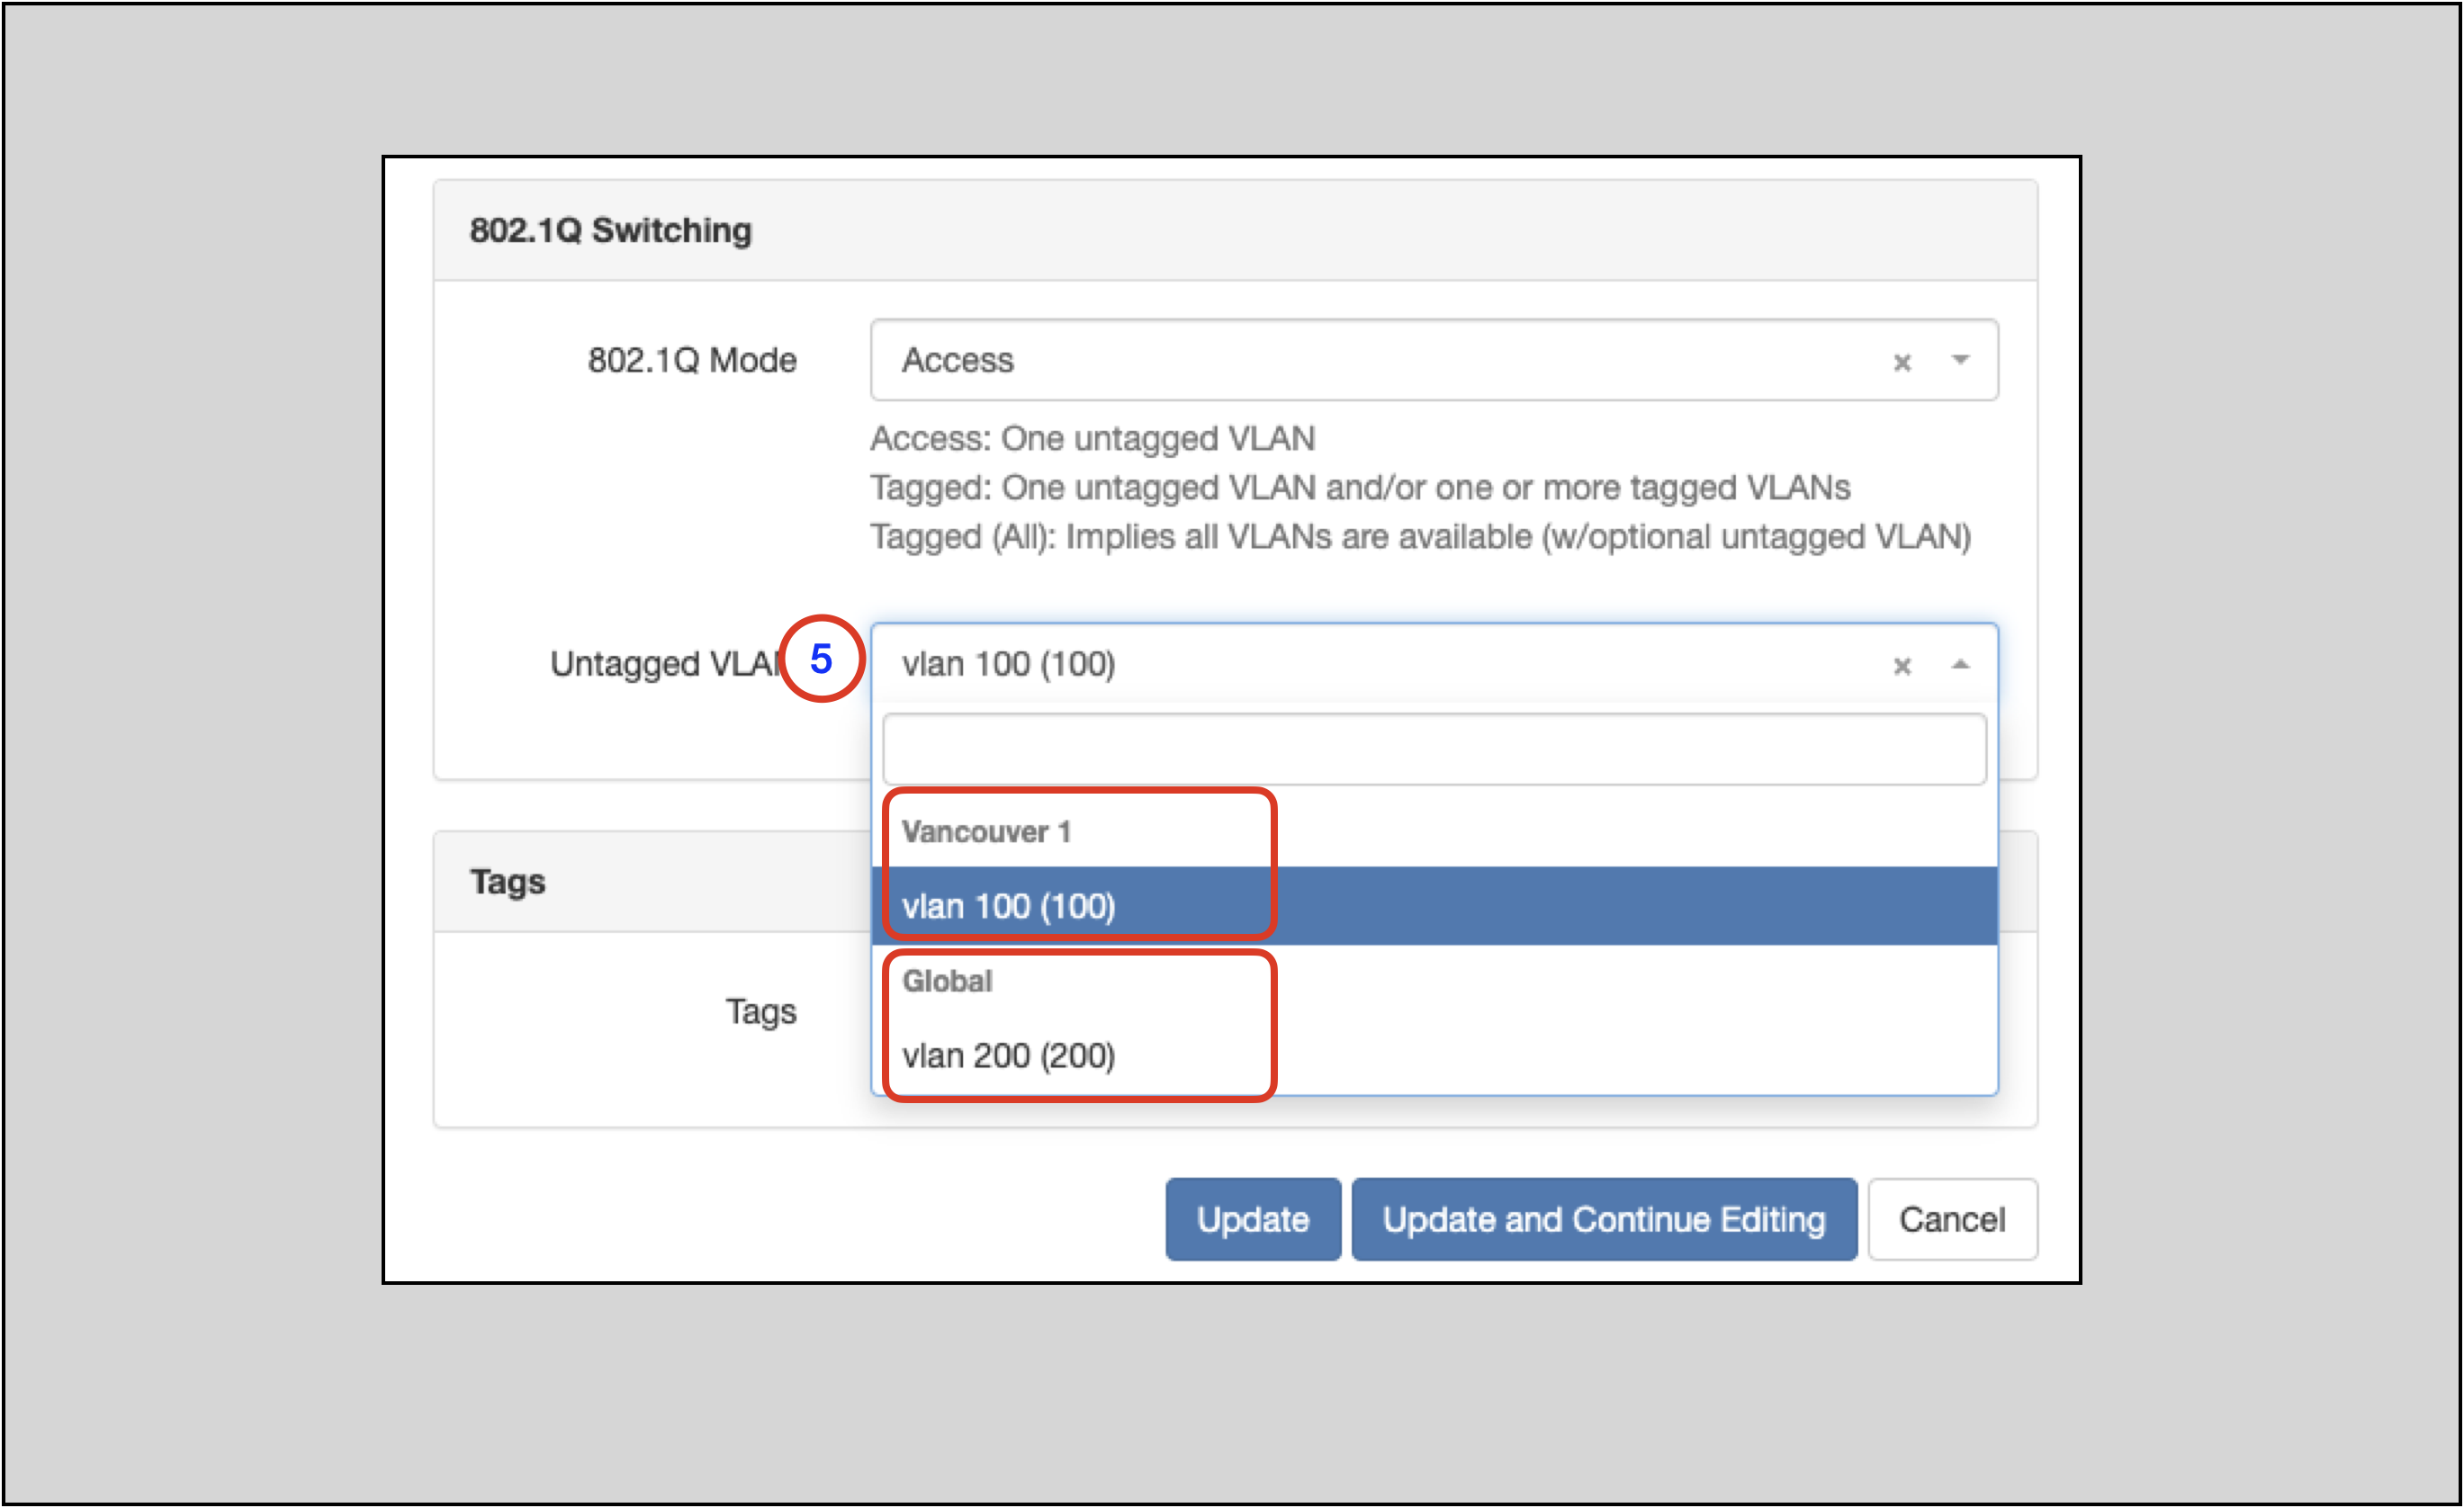
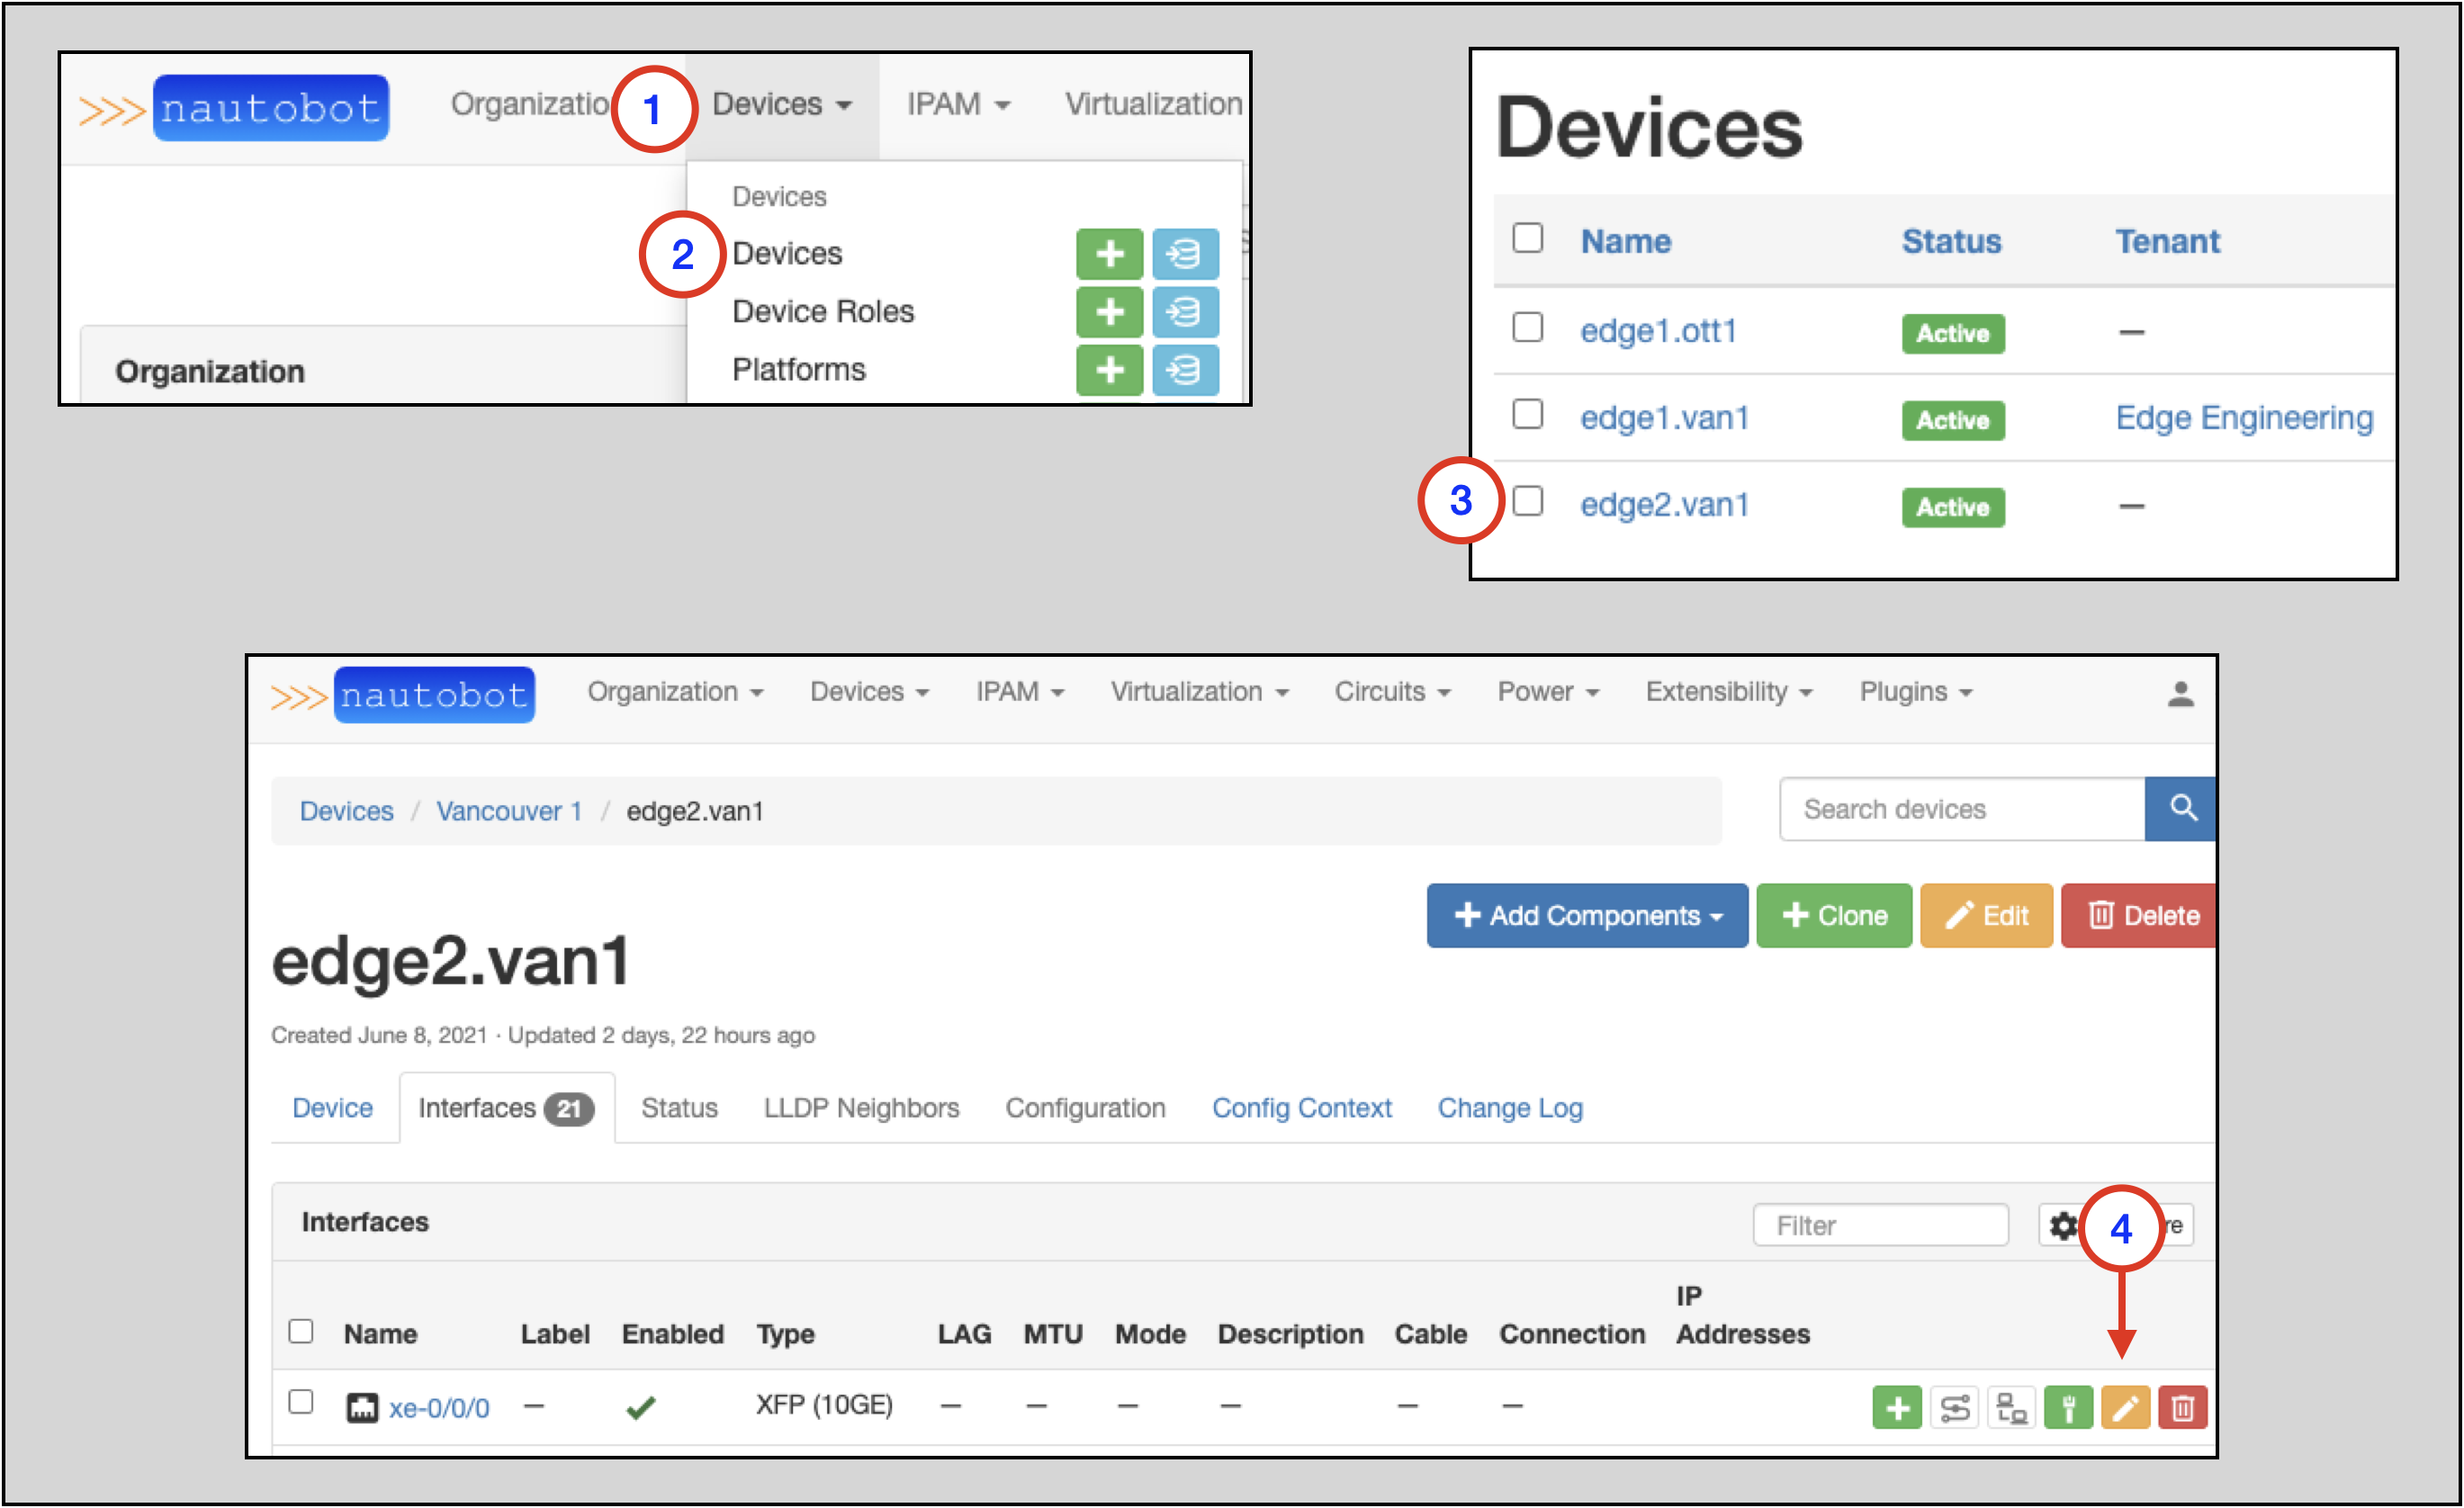
Assigning VLANs to an Interface
To assign a VLAN to an Interface:
- Click on IPAM on the top-level navigation menu
- Select Devices to go to the Devices main page
- Click on the name of the Device you wish to add a VLAN to (
edge2.van1) in this example - Click on the
Editbutton for thexe-0/0/0Interface to go to theEditing interface xe-0/0/0page - On the
Editing interface xe-0/0/0page, set802.1QMode toAccess(or whatever mode you need) and then click on the VLAN drop-down selector. Notice that there are two choices:- One choice is the
vlan 100instance specifically assigned to theVancouver 1Site - The other choice is
vlan 200, which was not assigned to a Site, and thus has a global scope
- One choice is the
Note
The vlan 100 instance that is assigned to the Ottawa 1 Site does not show up as an option for the Vancouver1 Site